How to Wire an Outlet Safely When the Box Is the Real Problem
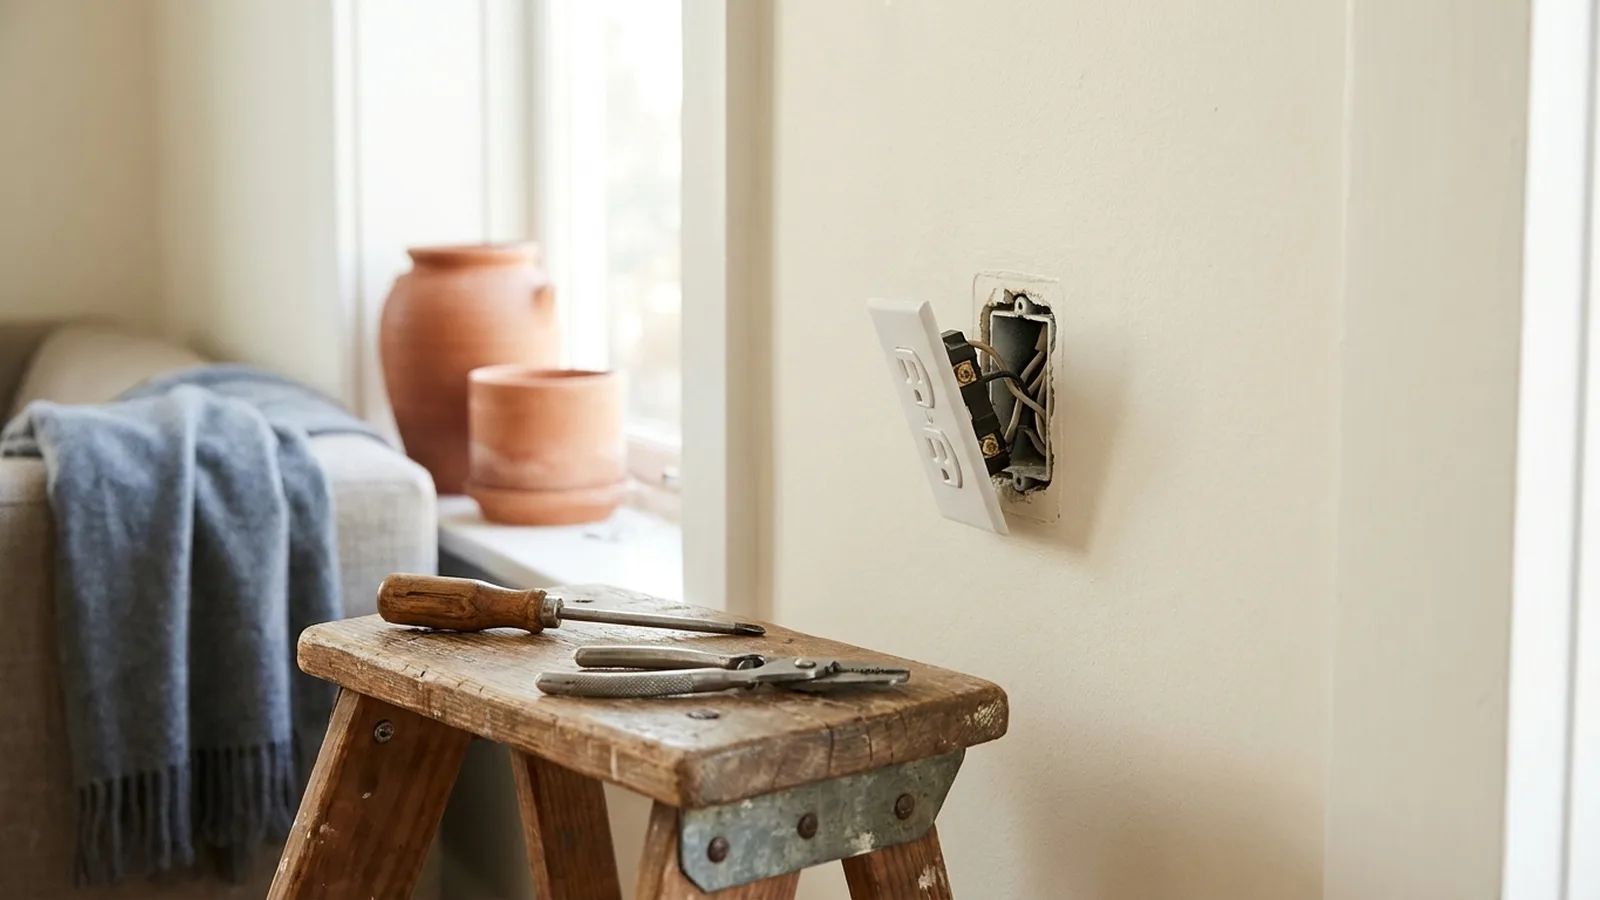
Say you bought a 1970s house and the living room outlet grips plugs about as well as a wet noodle. A lamp cord slides out every time someone walks past. You’ve read that swapping a receptacle takes ten minutes, so you grab a cheap replacement and a screwdriver. Then you pull the old one out and find two wires crammed on one side, a third scorched at the tip, and no ground at all.
That moment is why most guides fail you. They teach how to wire an outlet as if every box were perfect. Real boxes aren’t. This guide on how to wire an outlet covers the standard swap, then the surprises inside the wall that decide whether you finish in 20 minutes or stop and call a pro.
Electrical work is one part of keeping a house running, alongside diagnosing a breaker that keeps tripping.
Executive Summary
You can learn how to wire an outlet and swap a standard one yourself in about 20 to 30 minutes with a screwdriver, a stripper and a non-contact voltage tester. The skill isn’t the wiring. It’s the discipline around it: shut off power, test, prove the tester works, then test again.
Here’s what you’ll get below. Black goes to brass, white goes to silver, bare or green goes to the green screw. Pigtails beat pass-through wiring. Push-in "backstab" holes are the part pros argue about. A two-prong box has legal options, but only certain ones. And you’ll get a plain stop list: aluminum wiring, cloth-covered wire, a scorched box or a mystery cable means you put the screwdriver down.
Any change beyond a like-for-like swap may need a permit or a licensed electrician, depending on local law.
Can I really learn how to wire an outlet myself?
Yes, in most places a homeowner can replace a standard receptacle without a licensed electrician, and many jurisdictions don’t require a permit for a like-for-like swap. Rules vary by state and city, so call your local building department first. The device is simple. The risk sits in the box.
It’s a two-stage job: look first with the power off, then wire only if what you see is boring. Boring is the goal.
What tools and parts do I need?
You need a replacement receptacle that matches the circuit, a non-contact voltage tester, a plug-in outlet tester, wire strippers, needle-nose pliers and a hand screwdriver. Add your phone for a "before" photo. A multimeter helps but isn’t required for a basic swap.
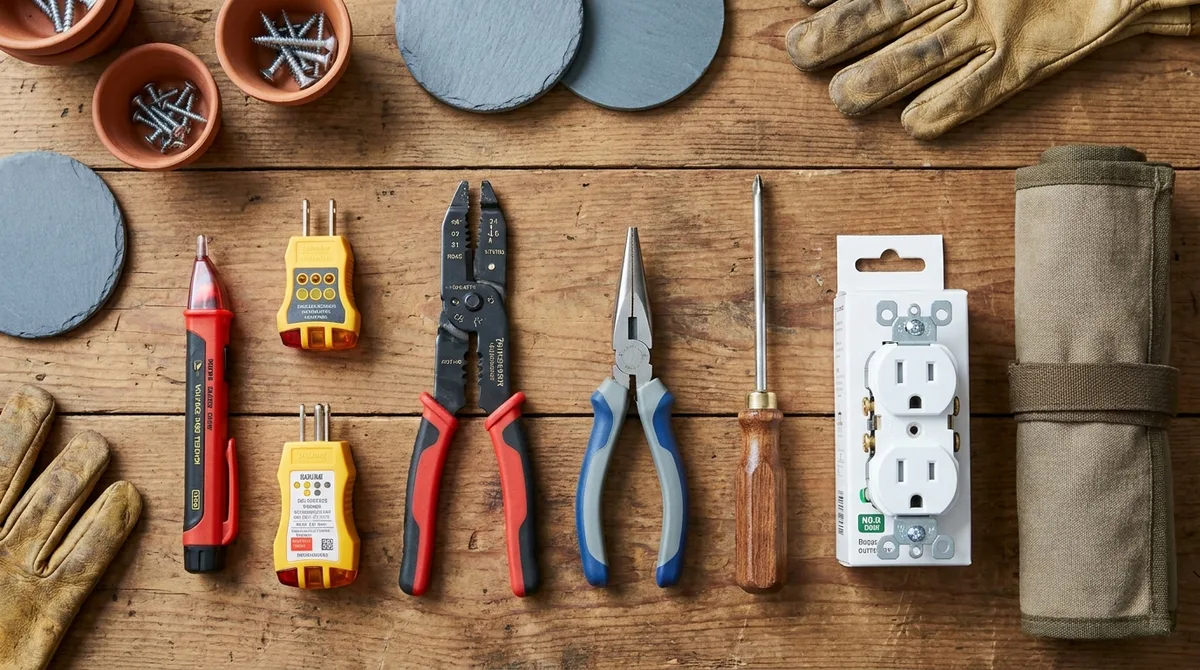
Match the device to the wire. Cable in most newer homes is NM-B, and the usual pairing is 14 AWG wire on a 15 amp circuit and 12 AWG on a 20 amp circuit, according to Nassau National Cable. Never put a 20 amp circuit on thinner wire.
How do I turn the power off and prove it is off?
Switch off the breaker, then test the outlet with a non-contact voltage tester, confirm the tester works on a known live outlet, and test again at the wires once the outlet is out. Breaker labels lie often enough that you should never trust them alone.
Test, prove, test. Every method of how to wire an outlet safely starts here.
- Plug a lamp into the outlet and flip breakers until it goes dark.
- Unscrew the cover plate and hold the tester near each plug slot.
- Check the tester on something you know is live, so you aren’t trusting a dead battery.
- Remove the two mounting screws, pull the outlet out and test the wires again.
If the lamp stays on after every breaker, or the room has odd extra wires, shut off the main. I’d take a reset of your clocks over a surprise.
What do the hot, neutral and ground wires do?
The hot wire (black or red) carries power in, the neutral (white) carries it back, and the ground (bare copper or green) is a safety path that only works during a fault. On the receptacle, hot goes to brass, neutral to silver, ground to green.
Before you wire an outlet, photograph the wires before you disconnect anything. Move one wire at a time. Future you, standing there holding three loose conductors, will be grateful.
How to wire an outlet step by step
To wire an outlet, strip about 3/4 inch of insulation, hook each wire clockwise around its screw, tighten firmly, connect ground first, then neutral and hot, fold the wires back into the box, screw the outlet in and fit the cover plate. The whole job takes about 20 to 30 minutes.
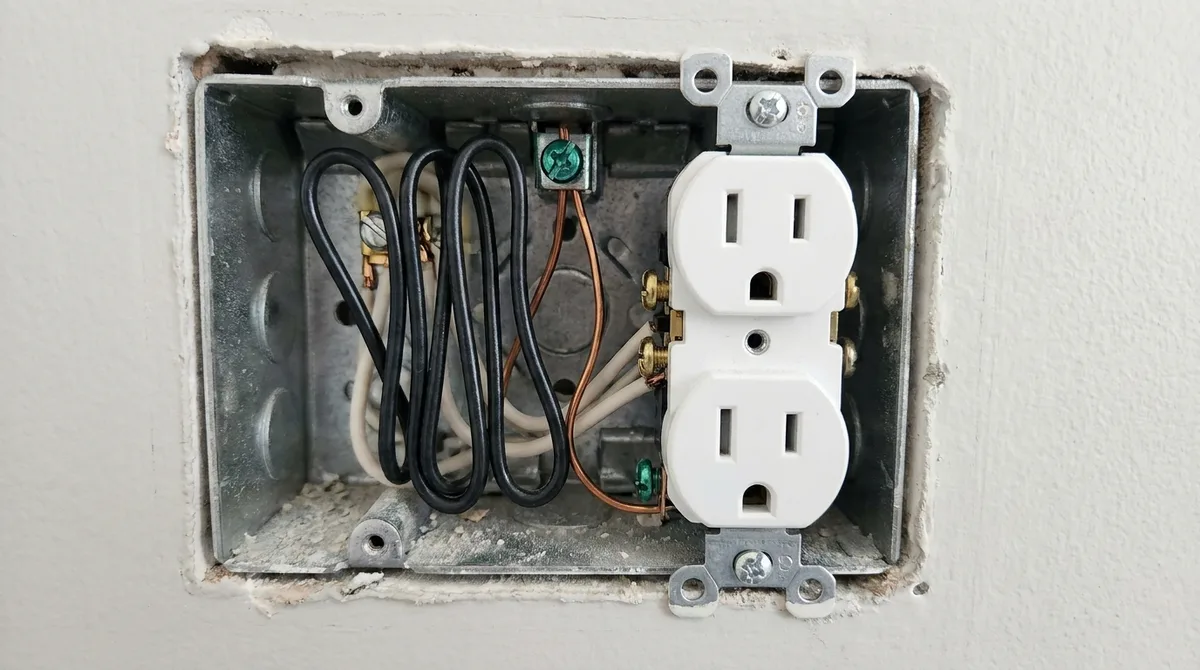
- Disconnect the old outlet, keeping the photo handy.
- Snip off any nicked or darkened copper and re-strip clean wire.
- Use needle-nose pliers to form a hook that wraps clockwise, so tightening pulls it in.
- Connect ground to green, white to silver, black to brass.
- Fold the wires in an accordion shape and seat the outlet without pinching anything.
- Restore power and check with a plug-in tester.
Should I use the screw terminals or the push-in holes?
Use the screw terminals. Push-in "backstab" holes rely on a small spring and can loosen and heat over time. Screw-clamp push-ins, where a plate tightens on a straight wire, are a reasonable middle ground, but screw terminals are the standard I’d pick.
Backstabbing is fast, but a loose connection creates resistance, and resistance makes heat. Many DIY and electrician forum threads lean the same way.
How to wire an outlet in the middle of a circuit
If two cables enter the box, use pigtails: join all the same-color wires with a connector, then run one short wire to the receptacle. Pass-through wiring, where each cable lands on its own screws, works but makes downstream outlets depend on this one device.
Say you open a box to wire an outlet and find a black wire on each brass screw, a white wire on each silver screw. That’s pass-through, and it’s legal. If you’re swapping anyway, converting to a pigtail takes five extra minutes, plus three wire connectors. The tradeoff is a more crowded box.
How to wire an outlet with no ground wire
If the box has no ground, you can replace a two-prong outlet with another two-prong, or with a GFCI receptacle marked "No Equipment Ground," according to IAEI’s reading of NEC 406.4(D). Don’t install a standard three-prong on an ungrounded box.
That label matters, and most guides on how to wire an outlet skip it. A GFCI protects you from shock even without a ground, but it doesn’t make the other plugs grounded. If you want true grounding, an electrician can run a ground wire or a new cable. Before you buy anything, check whether the other three-prong outlets in the room really are grounded. A plug-in tester will tell you in seconds.
When do I need a GFCI, AFCI or tamper-resistant outlet?
Current code can require a GFCI, AFCI, tamper-resistant or weather-resistant receptacle when you replace one in a location that now demands it, such as bathrooms, kitchens, garages, basements and outdoors. Adoption of code editions varies by city and state, so confirm what your local building department enforces before you buy the part.
A GFCI (ground fault circuit interrupter) trips when current leaks where it shouldn’t, which is why it lives near water. AFCI protection watches for arcing and is often provided at the breaker instead. Tamper-resistant outlets have shutters that block small objects, and they’re standard in many rooms now.
What about split or switched outlets and that little brass tab?
A brass tab connecting the two hot screws means both halves share one circuit. If two hot wires feed one outlet, or a switch controls one half, you must snap that tab off. If you aren’t sure, stop and photograph the wiring.
Take a typical kitchen counter outlet with two black wires. Pull the tab off by mistake and both halves sit on one wire, or the reverse, and a breaker may trip on the first appliance. The fix is to shut the power off and put things right. Red wires often mean a switched half or a second circuit.
How do I know the outlet is wired correctly?
Restore power, plug in an outlet tester and read the light pattern, then try a lamp in both receptacles. A correct result shows no open ground, no reversed hot and neutral and no dead half. Anything else means shut the power off again.
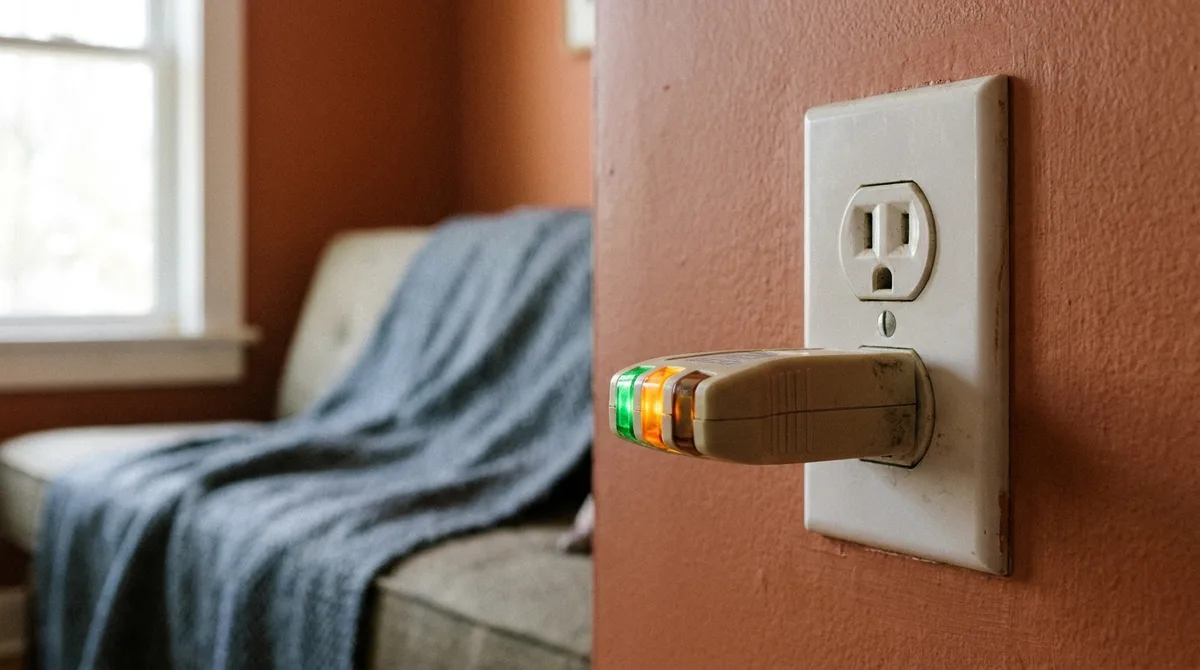
A three-light tester catches reversed polarity and open grounds, though it can’t catch everything, like a shared neutral.
What are the most common outlet wiring mistakes and how do I fix them?
The usual mistakes are reversed hot and neutral wires, a wire pinched behind the device, and a mismatched breaker. Each is easy to catch with an outlet tester and a careful look, and each is fixed with the power off.
These are composite examples, not real jobs:
- Reversed wires. Say someone lands the white wire on brass and the black on silver. A lamp still works, so it feels fine. A plug-in tester shows reversed polarity. Shut off power, then swap the wires to the correct screws.
- Pinched wire. A common version is shoving the outlet back in a crowded box and trapping a conductor under the device. The outlet goes dead or flickers. Power off, pull it out, refold the wires in an accordion shape and reseat.
- Wrong breaker. Picture a 20 amp breaker on a circuit run in thinner wire. That is a wiring problem, not an outlet problem. Don’t fix it by swapping devices. Have an electrician check it, since permits and code editions vary locally.
When should I stop and call an electrician?
Stop if you see aluminum wiring, cloth-covered or brittle insulation, knob and tube, scorch marks, melted plastic, a damaged box, wires you can’t identify or a breaker that trips on a new outlet. A licensed electrician and a permit are the right move.
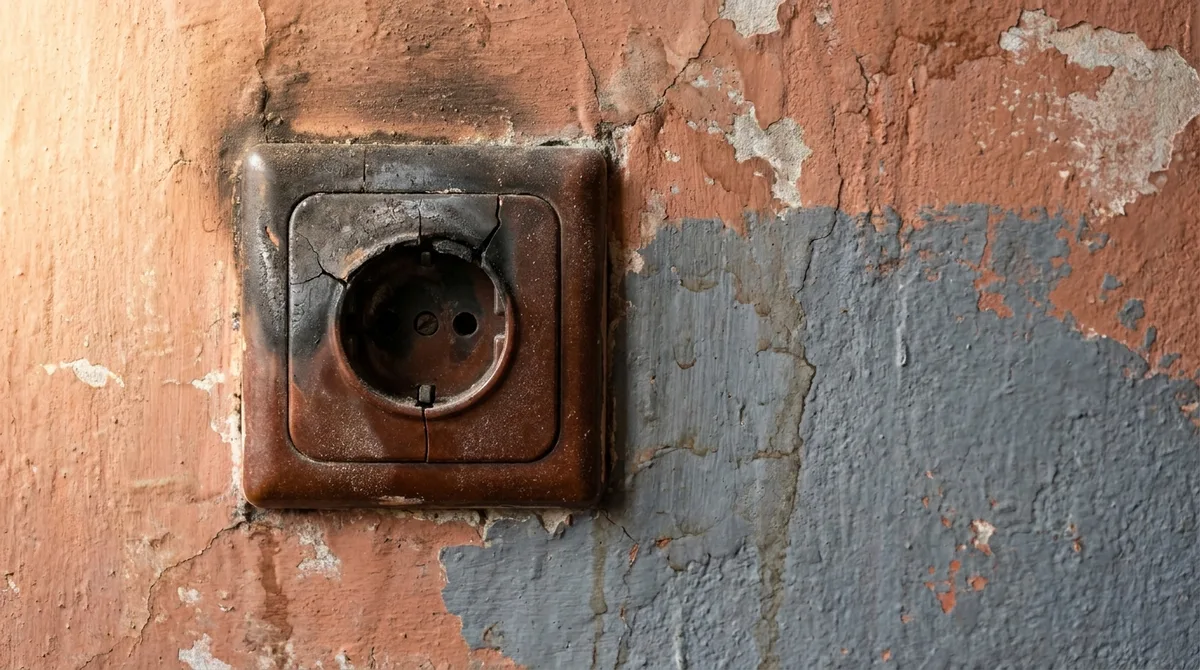
Also stop if the wires are silver-colored, three or more cables enter the box and you can’t tell which is which, or the room has no ground and you want grounded outlets. Calling isn’t cowardice. It’s good judgment. For the heating side of your house, see what a furnace replacement involves, another job where knowing the limit counts.
Frequently Asked Questions
Does it matter which wire goes on which screw?
Yes. Hot (black) goes to the brass screw, neutral (white) goes to the silver screw and ground goes to the green screw. Reversing them often still powers a lamp, which is why it’s dangerous. The outlet looks fine but the metal parts of a plugged-in device can become live. Use an outlet tester after every swap to catch reversed polarity.
Can I wire an outlet with the power on?
No. Even if you’ve heard of a worker changing a GFCI live, a homeowner should never do it. Shut off the breaker, test at the outlet with a voltage tester, and test again at the wires when the device is pulled out. Ten minutes of testing is cheaper than a hospital visit. If you can’t shut off power safely, stop and hire a professional.
Do I need a permit to wire an outlet?
Often not for a like-for-like swap, but it depends on your city or county. Many places require a permit for new circuits, added outlets or panel work, and not for simple replacement. A quick call to your local building department settles it. Permits also protect you, since inspection catches mistakes you can’t see. Our guide to why a breaker keeps tripping covers when a symptom needs a pro.
Should I use a 15 amp or 20 amp outlet?
Match the receptacle to the circuit’s breaker and wire. A 15 amp circuit typically uses 14 AWG wire, and a 20 amp circuit uses 12 AWG wire. Never upsize the breaker or the wire just to suit a device you like. Check the breaker label and the wire gauge printed on the cable, and confirm what your local code allows.
Can I replace a two-prong outlet with a three-prong?
Only if a ground is present in the box. Installing a three-prong on an ungrounded box is a common myth-fix that creates a false sense of safety. Your options are another two-prong, a GFCI marked "No Equipment Ground," or having an electrician add a ground path. A plug-in tester shows whether the existing three-prong outlets are truly grounded.
Is backstabbing really that bad?
It’s the weaker choice. Push-in holes rely on a spring clip, and under load they can loosen, heat and arc. Many electricians say they avoid them. Screw terminals clamp the wire mechanically and last longer. Screw-clamp push-in designs are a decent compromise. If the box already has backstabbed wires, moving them to the screws is a cheap upgrade.
Why doesn’t my new outlet work?
Start at the breaker, since it may have tripped. Then check for a wire that slipped off a terminal, a pinched wire or a tripped GFCI upstream. Shut off power and re-check each terminal before you assume the device is bad.
What is the difference between pigtail and pass-through wiring?
Pass-through lands each cable’s wires on the receptacle’s own screws, so the device carries current to later outlets. A pigtail joins matching wires with a connector and sends one short wire to the device. Pigtails keep the downstream circuit alive even if the outlet fails, which is why many electricians say they prefer them. Pigtails need more room in the box.
How much does an electrician charge to replace an outlet?
It varies by region, the electrician’s minimum call-out fee, access and what the box turns out to need. A simple swap is quick, but travel fees often dominate the bill. Ask for a written estimate and mention if wiring is old.
Can I install a GFCI outlet without a ground wire?
Yes. Code allows a GFCI receptacle on an ungrounded circuit when it is marked "No Equipment Ground,", and the labels come with the GFCI. Outlets downstream of it must not get a ground connection. It won’t ground anything, but it adds shock protection. It’s a legitimate fix, not a trick. Local code and permit rules still apply.
Conclusion
The honest summary of how to wire an outlet is that the device is easy and the box is the test. Shut off power, prove it, photograph everything, use the screw terminals, pigtail where you can and read what the wall is telling you. If the wiring is aluminum, scorched or confusing, hand it off without guilt.
That’s the real angle of this guide: a safe swap is mostly about knowing which boxes to leave alone. Check what your area enforces now, since the next outlet you replace may need a GFCI or tamper-resistant version.
Your next step is simple. Pick the outlet that bothers you most, open the cover plate and just look, with the power off. For another job that crosses into pro territory, see what a furnace replacement involves.
What will you find behind that cover plate?