Door Casing Styles and Sizes That Fit Your Ceiling and Walls
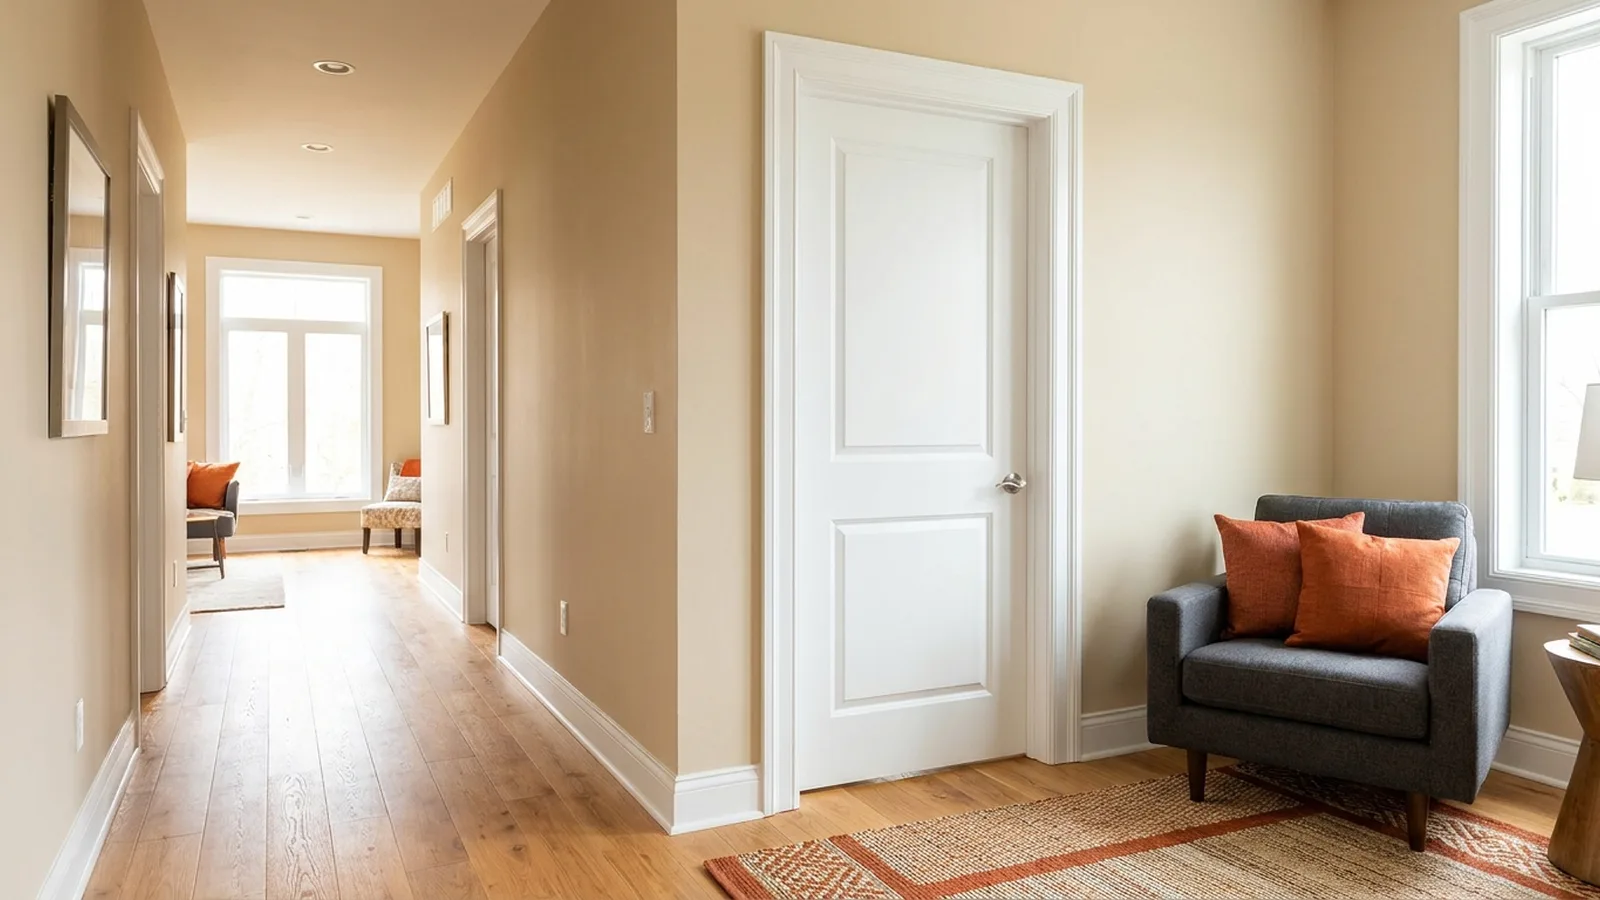
Say you just hung a new interior door. The slab swings nicely, the hardware gleams, and then you notice a raw gap where the frame meets the drywall. You grab the widest, fanciest trim at the store because it looked great on the shelf. At home, it crowds the corner, bumps the ceiling line and looks like a picture frame on a postage stamp.
That’s the catch with door casing. Most guides on door casing start with the catalog. I’d start with your walls. Ceiling height, corner space and wall flatness decide what looks right, and the profile is the easy part.
This is one piece of the bigger job of choosing and hanging doors, the same kind of project as picking a bathroom door that fits the room. Below you’ll get style comparisons, sizing rules of thumb and fixes for crooked walls. By the end, you’ll know what to buy before you touch a saw.
Executive Summary
You’ll leave with a clear way to pick casing for your own house: match its width to your ceiling height, keep one modest profile throughout, and stay out of trouble in tight corners.
Here’s what the guide covers. Styles are compared in a quick table, from flat craftsman stock to fussy colonial profiles. Material choice (MDF, pine, poplar, oak or PVC) comes down to moisture and finish. You’ll see how to decide between keeping old casing and replacing it when floors change, how to install it with a consistent reveal, and what to do when drywall isn’t flush.
The biggest worry is usually "Can I really do this myself?" For one door and a miter saw, yes, if you accept slow cuts and some caulk. Peel-and-stick kits are the one shortcut I’d skip. They’re decor, not real trim. Costs vary too much by region and wood to quote here, so I’ll name what drives them instead.
What Is Door Casing, and How Is It Different From Trim, a Jamb or Baseboard?
Door casing is the trim that frames a doorway and covers the gap between the door frame and the wall. It’s part of the wider family of trim and molding. The jamb is the frame itself, and baseboard runs along the floor. Casing is decorative and hides the joint, but it doesn’t change how the door swings.
Trim is the umbrella word. Molding (or moulding) is the shaped profile. Head casing runs across the top, side casing runs down each leg, and window casing is the same idea around windows. The mix-up that bites people most is baseboard. Some colonial casing is sold as baseboard too, which is why the two get confused. They can match, but they do different jobs.
Which Door Casing Styles Work in a Modern, Craftsman or Traditional Home?
The right style follows the house. Flat, simple stock suits modern and craftsman homes, while curved profiles like colonial suit traditional ones. Angi names styles such as Colonial, Stafford, Windsor and lamb’s tongue, plus mitered and butted joints. Pick one style for the whole house and the result almost always looks intentional.
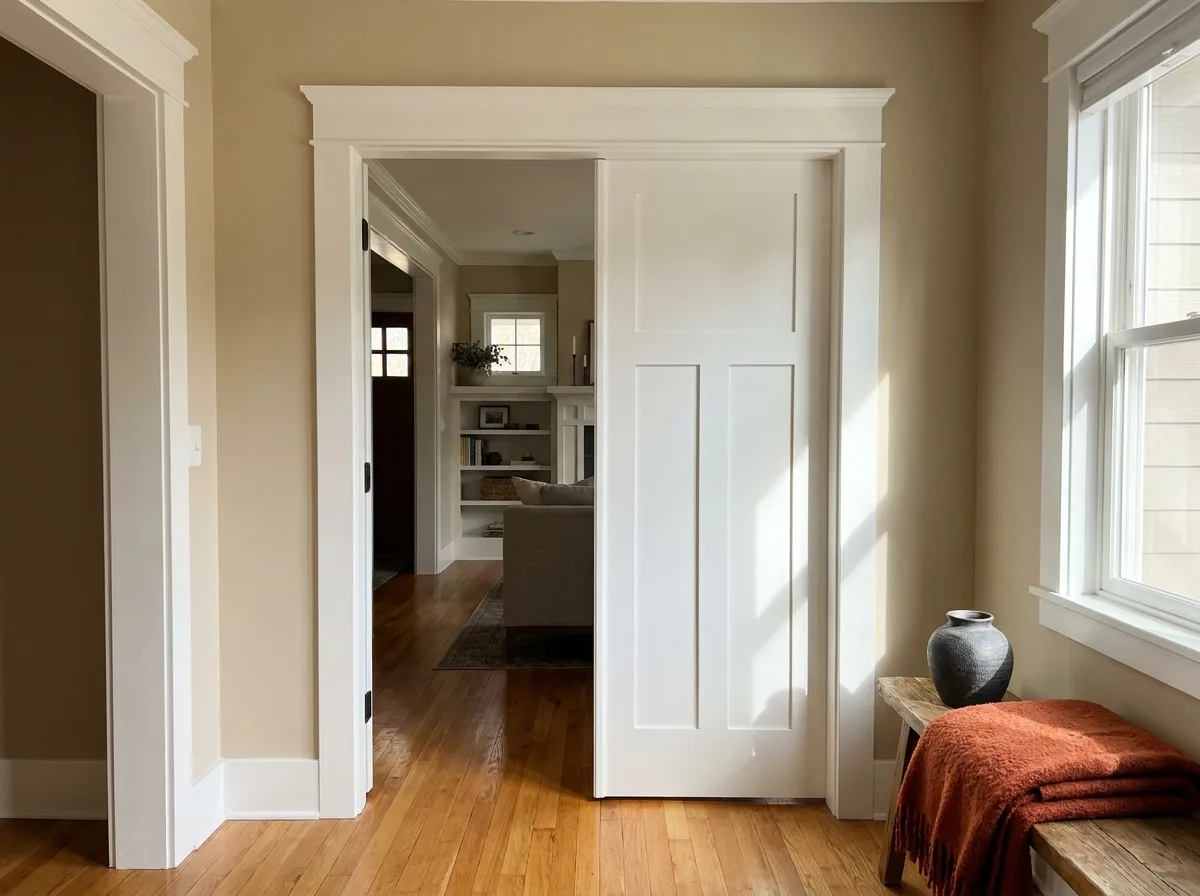
Here’s how the common options compare. These are general rule-of-thumb judgments, not tested ratings:
| Style | Look | Usual fit |
|---|---|---|
| Flat stock (1×4) | Clean, plain | Modern, minimalist |
| Craftsman | Flat boards | Bungalows, newer builds |
| Colonial | Rounded curves | Traditional homes |
| Windsor or Stafford | Curved, more detailed | Formal homes |
| Lamb’s tongue | Soft, tapered edge | Traditional homes |
A contrarian note: plain flat stock often looks better than a busy profile, especially in modern rooms. One Reddit thread asked if it "cheapens" the look. I’d say a crisp, well-fitted flat board beats a sloppy ornate one every time.
What Door Casing Material Should You Choose?
Choose by moisture and finish. MDF is cheap, smooth and pre-primed for paint but swells when wet. Pine is easy to cut but dents. Poplar paints cleanly, oak suits stain, and PVC or composite handles damp spots in general practice. Truitt and White, an installer guide, makes the MDF, pine and oak distinctions.
Paint-grade means you’ll cover it, so a finger-jointed or MDF board is fine. Stain-grade means the grain shows, so spend on clear oak or poplar. In a bathroom or exterior spot, I’d skip MDF entirely. One bad leak and the bottom of the leg puffs up like a sponge. Mixed species stain differently, so buy stained pieces together.
How Wide Should Door Casing Be for Your Ceiling Height?
Match the casing width to the ceiling. Lower ceilings need slimmer casing, so the trim doesn’t crowd the room. Many people start with moderate widths on standard 8-foot walls and go wider on taller ones. There is no code for this, so test with a cardboard mock-up.
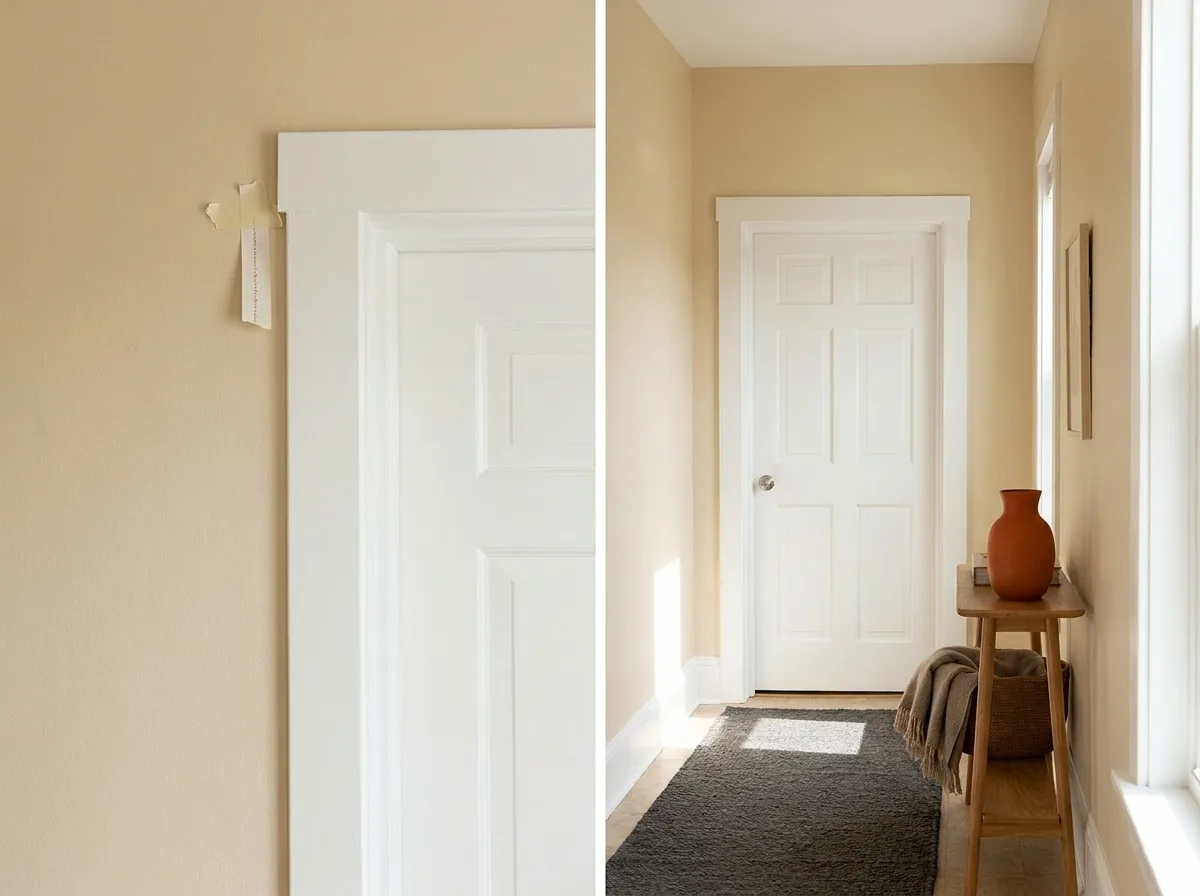
Here’s a scenario from a Reddit thread. A homeowner had 90-inch ceilings, so roughly 7.5 feet. Using 1×3 sides with a 1×4 head left a few inches of wall above the door and kept the look craftsman. Opinions varied on how much space to leave above the head. One commenter said 4 inches, another said 1 inch if there’s no crown molding.
Here’s my rule: tape a strip of paper at the planned width and stand back. If it looks heavy, go narrower. Door casing typically covers 1 to 2 inches of wall beyond the jamb, so the rest is your call.
What if Wide Door Casing Won’t Fit a Tight Corner?
Rip the casing narrower, or pick one slimmer profile for the whole house. If only 2 inches of wall sit between the door and a corner, standard wide stock won’t fit. Trim the back edge on a table saw, then caulk and paint it. Nobody will notice.
Different door casing widths in one house look worse than one modest width everywhere. A common version of this mistake: a homeowner buys 4-inch casing for the living room, discovers the closet door has a 2-inch gap, and ends up with two mismatched looks. Pick the width your tightest doorway can handle and repeat it. Flat stock makes this easy, since a ripped edge is invisible once painted.
Plinth blocks help at the bottom. These are the thicker square blocks where door casing meets baseboard, and they let the baseboard stop cleanly instead of colliding with the casing. Because the block is taller and thicker than both pieces, it also hides small height mismatches at the floor. If your baseboard is thicker than your casing, a plinth block is the tidy fix, and it suits flat stock as well as ornate profiles.
Do you need casing on every door? Closets and rooms you see daily should match, so the house reads as one design. A rarely seen utility door can get simpler trim, but a bare gap between jamb and drywall always looks unfinished.
Should You Replace Door Casing When You Change Floors or Baseboards?
Usually no. Keep good door casing and undercut it instead. Use a jamb saw or oscillating tool to cut the bottom so new flooring slides under. It is harder to replace than baseboard, and matching window casing adds complexity. Replace only when it’s damaged, rotted or the style clashes.
Picture new floors going in and the urge to rip out everything. The Reddit advice is blunt: "when in doubt, leave it." Before pulling any piece, run a razor knife along the paint line so the paint doesn’t tear drywall paper. Thermal King notes that factory-matched finishes are hard to reproduce. Replace if the wood is rotted, split or a far-off style from the rest of the house.
How Do You Install Door Casing Step by Step?
Mark a reveal of about 1/4 inch on the jamb, cut the head piece first with 45-degree miters, nail with 18-gauge brads, then add the sides. Truitt and White recommends 1.5 to 2 inch nails every 12 to 16 inches. Go slowly on your first door, since clean miters take practice.

- Set a consistent reveal. The reveal is the small step of exposed jamb, usually 1/4 inch, that gives the joint a shadow line. A reveal gauge or a Trimble tool speeds this up.
- Cut the head casing first. Miter both ends at 45 degrees on a miter saw. Borrow or rent one if you need to.
- Nail the head in place with brads and a brad nailer.
- Measure and cut each side, mitered at the top and square at the floor.
- Fill nail holes with wood filler, caulk the wall seam with paintable caulk and sand lightly.
Mitered joints look refined but open up on uneven walls. Butted joints, where one board sits square against another, forgive more.
DIY or pro? One door with a miter saw is a fair first project if you accept slow cuts and some caulk. Hire a trimmer if you have many doors, very wavy walls or no tools. For electrical boxes or anything structural near the door, hire a licensed pro, and check local codes since they vary.
How Do You Fit Door Casing on Uneven Walls or Drywall That Isn’t Flush?
Fix the gap, not the casing. If the jamb sits recessed, add shim strips (furring) to bring it forward. If drywall sticks out, plane the jamb edge or scribe the back of the casing to the wall. Fully flat casing needs a flat surface, so pre-hung doors often need this.
Pre-hung doors come without casing and can land slightly off the wall plane. In old plaster homes, nothing is square, so scribing with a compass helps casing hug a wavy surface. Caulk hides small gaps, but a 1/4-inch hole means furring is the better answer.
Should You Paint Door Casing Before or After Installing It?
Do both, in parts. Prime and paint a first coat before installation, ideally in a garage, then fill nail holes and caulk seams and finish with a final coat in place. This gives clean edges and a seamless result without taping off a finished wall.
Prepainting also keeps drips off the floor. Just remember filler and caulk always need a touch-up.
Are Peel-and-Stick Casing Kits Worth It?
Mostly no. Peel-and-stick kits are decor, not true door casing, since they won’t cover a real jamb gap. They can dress up a flat wall or a fake door in a rental, but for a proper doorway, use wood or MDF. Amazon sells them next to flexible casing for curves.
Flexible casing is the real option for arched openings. Use it only there.
Does Exterior Door Casing Work Differently?
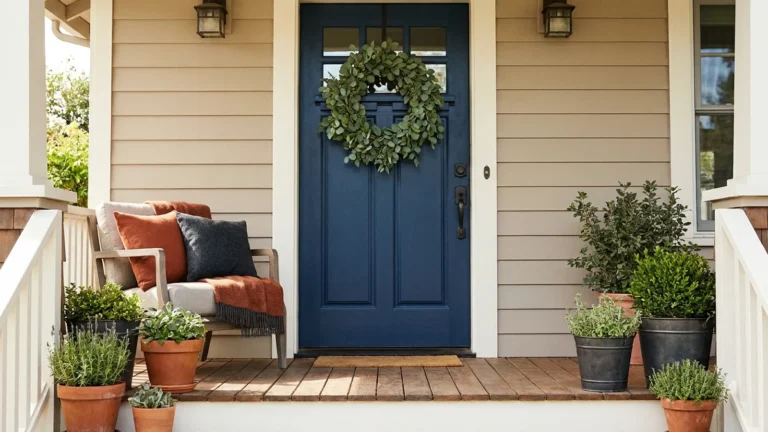
Yes. Exterior casing, often called brickmould, faces weather, so it usually calls for rot-resistant material such as PVC or composite, plus careful caulking. Interior casing never sees rain, so the stakes are lower. Match it to the siding and your front door style.
Flashing and weatherproofing details vary by climate and siding type, so ask a local pro before you finalize an exterior install. A glass entry door or a farmhouse look changes the proportion, and our glass front door guide shows how trim and door work together.
Frequently Asked Questions
What is the casing of a door?
The casing is the trim around a door opening. It covers the gap between the frame and the wall, so the joint looks finished. It sits on both sides of an interior door and outside on an exterior one. Casing is mostly decorative, though it does hide insulation and shims behind it.
Is door casing the same as trim?
Not exactly. Trim is the broad category that covers casing, baseboard, crown and chair rail. Casing is the specific trim around doors and windows. Think of trim as the family name and casing as one member. Planning a bathroom update too? This bathroom door guide covers sizes.
Can you buy just door casing?
Yes. You can buy casing by the length at home centers and lumber yards, or in kits that include pre-cut pieces. Buying lengths gives you more control over width and species. Check that the grade, paint or stain, matches your plan before you load the cart.
What reveal should door casing have?
Most installers aim for about 1/4 inch of exposed jamb. Truitt and White gives that figure too. Keep it the same on every side and every door in the room. The exact number matters less than consistency, because the eye picks up uneven shadow lines faster than a slightly different measurement.
What nails should I use for door casing?
Use 18-gauge brad nails, 1.5 to 2 inches long, spaced every 12 to 16 inches, per Truitt and White. Nail into the jamb and the wall stud. A brad nailer is much faster than hammering, and you can rent one. Always fill the holes before painting.
Does door casing need to match window casing?
It doesn’t have to match exactly, but it should relate. Same style and similar width look planned, while clashing profiles look random. Many people use the same casing on windows and doors in a room. If your windows have a different design, keep the proportions close.
Can you put new casing over old?
It’s possible, but rarely smart. Stacking trim adds thickness and creates uneven edges, and old paint layers can hide problems. Remove the old piece carefully by scoring the paint line first. If the old casing is fine, keep it. For a related hardware refresh, see how to replace a door handle.
How much wall should casing cover?
It typically covers about 1 to 2 inches of wall beyond the jamb, depending on width. The rest depends on your ceiling and corners. Wider boards look grander but need space. Measure your tightest doorway before you commit, because one narrow spot decides the width for the whole house.
Does door casing affect how a door works?
No, that’s a myth. Door casing is cosmetic and covers the joint between the frame and the wall. Angi makes the same point, and it matches what most installers see on the job. A door sticks because of the jamb, hinges or humidity, not the trim. If your door binds, fix the frame, not the casing.
Is baseboard the same as casing?
No, that’s another myth. Baseboard runs along the floor and protects the wall. Door casing frames doors and windows. Some profiles, like colonial, are sold for both, which causes the confusion. They can match for a cohesive look, and plinth blocks join the two cleanly at the floor.
Conclusion
Back to the homeowner with the crowded corner. The fix wasn’t a fancier profile. It was choosing door casing that fit the ceiling, the tightest doorway and the wall itself. One modest width, repeated everywhere, wins over a mixed bag of expensive styles.
I’d bet flat, simple trim is the friendliest choice for first-time DIYers, since a clean cut matters more than a clever profile. Your next step: tape paper strips at your planned width on the tightest door in the house. If it looks right there, it’ll look right everywhere.
For more planning, see how a glass front door changes your trim choices or how to swap a door handle. Which doorway in your house will be the hardest one to trim?