Garage Door Cable Replacement: Costs, DIY Limits and Steps

You hear a loud bang from the garage. Later you find one side of the door hanging crooked, with a frayed steel cable trailing off the drum. That is the moment most people start searching for garage door cable replacement, and they usually want three answers fast. Can I do this myself? What should it cost? Is it safe to leave it for a few days?
Replacing garage door cables is a small job on paper. The danger comes from the springs and the weight attached to those cables, not the cable itself. This guide shows you how to tell which problem you really have, what each repair costs, and exactly where DIY should stop.
Quick answer
- A pair of cables costs very little in parts. A pro visit typically lands between $100 and $350, depending on the source and the extras.
- Extension-spring doors are the realistic DIY case. Torsion-spring work belongs to a trained technician.
- Never run the door with a snapped cable, and replace both sides together.
What does a garage door cable do?
Garage door cables are braided steel lines that carry the door’s weight. Each one runs from a bracket at the bottom corner of the door up to either a drum (torsion systems) or a pulley (extension systems). The springs create the lifting force, and the cables transfer it to the door.
Most are galvanized aircraft-style cable in 1/8 inch or 3/32 inch thickness. Doors commonly weigh somewhere between 150 and 400 pounds, so each cable carries a serious load every time you press the remote. People searching for garage door wire replacement are looking for the same part. It is a stranded steel cable, not ordinary wire.
How do I know my garage door cable needs replacing?
You need new cables when you see fraying, broken strands, rust, kinks, or a cable that has jumped off its drum or pulley. A door that hangs crooked, jerks on the way up, or slams down is also a strong sign. A cable that snapped completely often announces itself with a bang.

Check these before you touch anything:
- Frayed or "bird-caged" strands near the bottom bracket
- A visible gap where the cable should sit in the drum groove
- Slack, loose cable on one or both sides
- One side of the door sitting higher than the other
- A door that feels extremely heavy by hand, or won’t stay up
Look at both cables, not just the obvious one. If the cable is still intact, the problem may be elsewhere, which we cover below.
Why do garage door cables snap or come off the drum?
Cables fail from age, friction, moisture, and mechanical problems. Steel strands fatigue after thousands of cycles. Rust weakens them from the inside. Cables also get chewed when a door binds in the track or sits out of level, which is why a cable that keeps coming off points to a root cause rather than bad luck.
A broken torsion spring is another common trigger. When the spring lets go, the cable goes slack and often slips off the drum. Several Reddit threads describe people who assumed they had a "cable problem" and then found a broken spring behind it. Another common one: a homeowner has one side repaired, and the other side snaps weeks later because it was just as worn.
Repeatedly pressing the remote while the door is stuck can also yank a cable out of place. If the door stalls, stop.
Is it safe to use the door with a broken cable?
No. A door with a broken cable can drop, tilt, jam in the track, or slam shut without warning. An unbalanced door that weighs a few hundred pounds can injure a person or crush a car bumper. The opener is not built to carry that weight, so don’t let it try.
If a cable has just snapped, do not move or operate the door at all, especially if it is open or hanging crooked. Unplug the opener, keep people and vehicles clear of the door, and call a garage door technician. Only a door that is already fully closed and level can stay as it is until help arrives. Using the emergency release to "see if it moves" is a classic mistake, because a loose door can fall instantly.
Torsion or extension springs: which system do I have?
Torsion springs are tightly wound coils on a metal bar mounted above the door opening. Extension springs are long, stretchy springs that run along the horizontal tracks on both sides. Which one you have decides how risky the repair is.

| Feature | Torsion system | Extension system |
|---|---|---|
| Spring location | Above the door, on a bar | Along both horizontal tracks |
| Cable connects to | A cable drum on the bar | A pulley at the end of the spring |
| DIY risk | Very high, winding bars required | Moderate, still serious |
| Common in | Newer and heavier doors | Older homes and lighter doors |
Not sure? Stand inside the garage and look up. A bar with coils across the top means torsion. Springs along the track means extension. Extension systems should also have a safety cable threaded through each spring. If yours are missing, add them during this repair, because they keep a broken spring from flying across the garage.
Can I replace a garage door cable myself?
Yes, on an extension-spring door, if you are handy, have a helper, and follow the steps carefully. Check your local rules and any HOA requirements first, since they vary. On a torsion system, no. Releasing and restoring spring tension takes winding bars and training. The Door and Access Systems Manufacturers Association (DASMA) urges homeowners to leave torsion spring work to trained technicians, and I agree.
The most useful thing you can do before any garage door cable replacement is diagnose first. Use this checklist:
- Cable slipped off the drum, spring intact, door level: often a short pro fix, or a careful DIY on extension systems.
- Cable frayed or snapped: replace both cables.
- Cable slack and the door feels very heavy: suspect a broken spring. Stop and call a pro.
- Door is crooked, bent track or damaged rollers: call a pro, because a new cable will fail again.
One Reddit poster wrote that most people say call a professional when a cable slips off the spool, then found the real culprit was a broken spring. Misdiagnosis is the biggest trap here. A quick cable reseat on a door with a dead spring only buries the problem.
What tools and parts do I need?
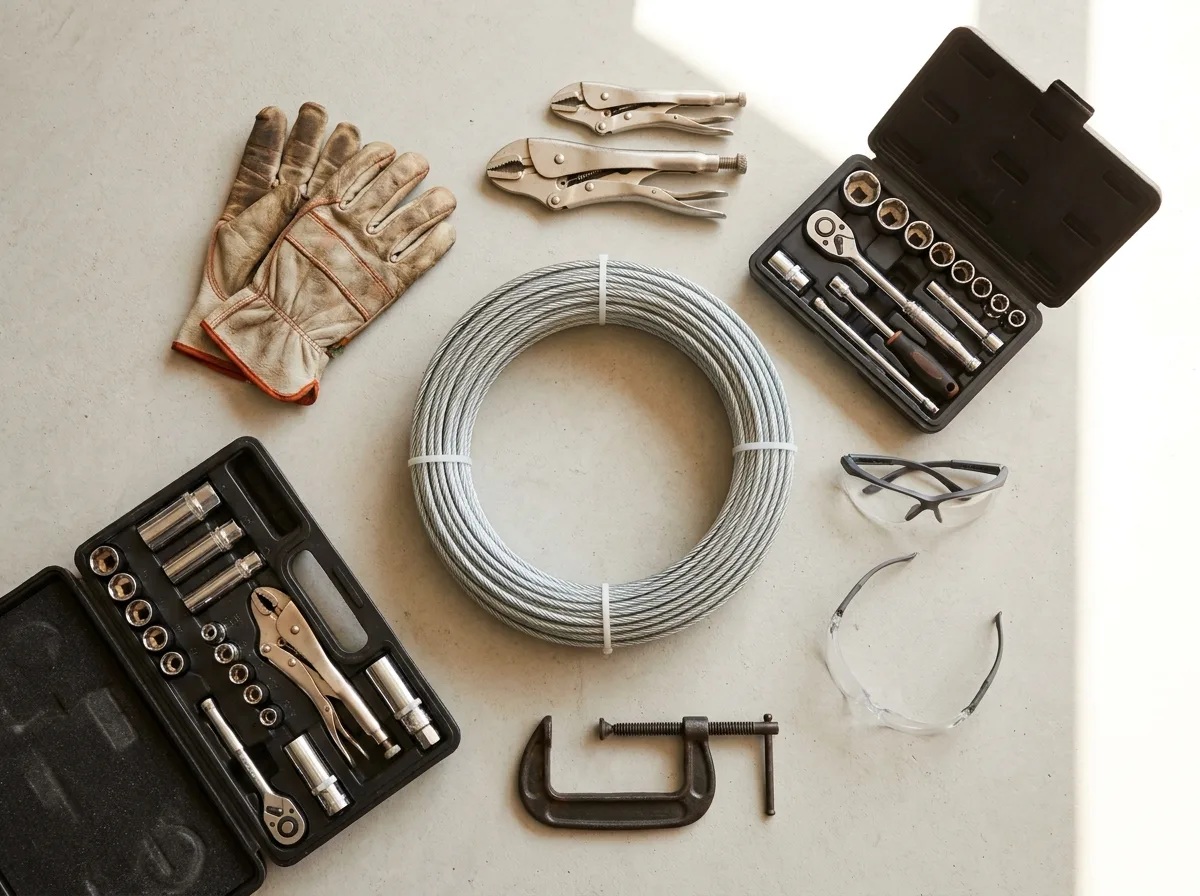
For an extension-spring door you need a matched cable pair, a sturdy ladder, locking pliers or C-clamps, a socket set, safety glasses, work gloves, and a helper. Match the cable to your door height and the original diameter. Replace pulleys at the same time if they are worn or wobbly.
Retail prices are modest. In October 2026, basic cable options at Home Depot, from brands such as Prime-Line and Clopay, ran about $5 to $9 each. Lowe’s sold a RELIABILT 2-pack extension spring cable for $11.49. Angi lists a replacement pair at $12 to $50 overall. Kits, longer cables and name brands push the price up.
Winding bars are specialist tools, not a DIY purchase, and a screwdriver is never a substitute. I would skip torsion DIY altogether.
How do I replace a garage door cable on a torsion system?
The short answer is that you shouldn’t unless you are trained. Releasing the spring so the cable goes slack requires winding bars, exact turn counts, and tight control. This section explains what the job involves so you can judge a technician’s work, not so you can copy it at home.
How to replace garage door cable on a torsion door, from the technician’s side
Here is the usual sequence:
- The pro closes the door, clamps the track so it can’t rise, and unplugs the opener.
- They release the spring tension in small, controlled quarter turns with two winding bars.
- The old cable comes off the bottom bracket and the drum.
- The new cable goes onto the bracket pin, up along the door, and into the drum groove with the right wrap.
- The pro rewinds the springs to the turn count that matches your door and spring specs.
- Finally they remove the clamps and check balance, lifting the door halfway to see whether it holds.
Steps 2 and 5 are where people get hurt. If a quote skips balance testing or the turn count, treat that as a red flag. Local rules and manufacturer instructions vary, and your door’s manual is the final word.
How do I replace a cable on an extension-spring door?
Extension systems are more forgiving, though the door’s weight is still the hazard. Work with a helper, wear glasses and gloves, and read your door’s manual first. If anything is bent, broken or unfamiliar, stop and call a pro.
- Unplug the opener and raise the door fully open by hand.
- Lock pliers or C-clamps onto the track just below the bottom roller on both sides so the door can’t move.
- Confirm the door is held by the clamps, not by the springs. Never loosen a spring that is stretched under load.
- Take the old cable off the bottom bracket, then unhook it from the pulley and the track-side anchor.
- Feed the new cable through the pulley the same way the old one ran, and secure both ends. The springs should stay relaxed and unstretched with the door fully up. If they look stretched or the door will not stay up on its own, stop and call a pro.
- Repeat on the other side, so both cables match in length and tension.
- Check that each spring has its safety cable, and add one if it doesn’t.
- Remove the clamps one at a time, lower the door slowly by hand and test it halfway up. It should hold in place.
Once it moves smoothly, reconnect the opener. If the door sags to one side, the cables are not equal and need adjusting.
Should I replace both cables at once?
Yes. When you are replacing garage door cables, do the pair together. Cables wear at the same rate, so when one fails, the other is usually close behind. A Reddit poster described exactly this: one cable was reattached for about $225, and the second side snapped within weeks. Paying for a second visit costs more than doing both together.
Parts for the second cable are cheap and labor is already included in the visit. Replace worn pulleys, rollers or bottom brackets at the same visit, since the door is already apart.
How much does garage door cable replacement cost?
Most homeowners pay roughly $100 to $350, with a national average near $225 according to Angi. HomeGuide puts a standard cable replacement at $150 to $250. Prices vary by region and company, so treat these as starting points. The cable itself is a small part of the bill. You are paying for labor, the service call and the risk the pro takes.

The table shows typical ranges reported by HomeGuide and Angi in 2025 to 2026.
| Job | Typical cost | Source and what drives it |
|---|---|---|
| Cable pair, parts only | $12 to $50 | Angi. Length, brand, kit |
| Standard cable replacement | $150 to $250 | HomeGuide. Door height, torsion or extension |
| Tensioning or balancing | $50 to $150 (Angi), $100 to $200 (HomeGuide) | Spring work, door weight |
| Larger overhaul | $200 to $400 | HomeGuide. Rollers, brackets, drums |
| Emergency or after-hours | $250 to $350 or more | HomeGuide. Time of day, travel |
Labor typically runs $75 to $150 an hour, with service calls around $50 to $75. Imagine your 16-foot door has two frayed cables and a worn pulley. A fair quote might land near the middle of the standard range plus a small parts charge. If one spring is also broken, expect more, since a Reddit poster who replaced two springs, two cables and four pulleys reported about $650 in total.
How do I avoid overpaying or getting upsold?
Ask for the diagnosis in writing and an itemized quote before work starts. Confirm the technician is licensed and insured where your state or city requires it, since those rules vary. Reddit threads show quotes that ranged from $129 for a ten-minute reseat to nearly $2,500 from one contractor for a job other commenters valued at far less. The gap is mostly the upsell.
Use these checks:
- Ask what failed. A cable, a spring, a drum or the opener?
- Ask for parts and labor to be listed separately.
- Get at least two quotes, and compare them line by line.
- Be cautious if the first answer is "you need a new opener." A broken cable does not break an opener.
- Ask whether safety cables will be installed on extension doors.
- Ask whether the technician will balance-test the door.
A fair upsell exists, such as swapping worn rollers or springs that are near the end of their life. A bad one inflates the diagnosis. The same quote habits help on larger projects, like a bathroom remodel, where itemized bids also protect your budget.
How long do garage door cables last, and how do I keep new ones from failing early?
Cables typically last seven to ten years, according to HomeGuide, though heavy daily use shortens that. The best way to protect new ones is to find out why the old ones failed. A chewed cable means something is binding.
- Inspect cables, drums and pulleys a couple of times a year and look for fraying.
- Keep the tracks clean, straight and level.
- Check that the door doesn’t rub or bind on the way down.
- Use the remote once, then wait. Repeated presses on a jammed door strain the cables.
- Swap worn parts as a set rather than one at a time.
When is a new door cheaper than more repairs?
A new door starts to make sense when repairs keep stacking up. HomeGuide notes that a new garage door typically runs $700 to $3,500 installed, and replacement becomes worth considering when the door is 15 to 20 years old with repeated failures. Spending $250 on garage door cable replacement is easy to justify. Spending that every year is not.
It is the same repair-or-replace logic you would apply to a furnace replacement. If the garage is becoming a workshop or storage room, a sliding barn door can close off the interior doorway without needing swing clearance.
Frequently Asked Questions
How long does it take to replace a garage door cable?
A professional usually finishes in about 45 to 90 minutes, and HomeGuide estimates one to two hours. A first-time DIY job on an extension system can take longer because of ladder work, clamping and testing. Rushing is how people get hurt, so budget a relaxed afternoon and a helper.
Can I just put a cable that came off the drum back on?
Sometimes, but only if the cable is undamaged, the spring is intact and something fixable caused it. A cable that jumps off usually does so for a reason, like a broken spring, a bent track or a door that is out of level. Reseating without finding the cause means it will happen again.
Where can I buy replacement garage door cable?
Home Depot and Lowe’s stock cable assemblies and pairs, and garage door supply shops carry more options. Amazon sells kits too. Buy a matched pair designed for your door type and height, and avoid generic wire rope from the hardware aisle.
What size cable do I need?
Most residential cables are 1/8 inch or 3/32 inch galvanized aircraft cable. Length depends on door height and on whether your door uses a drum or a pulley, since a drum system needs extra cable to wrap around the drum. Measure the old cable end to end if it is intact, note your door height, and check the manual or label. Bring the old cable to the store to match diameter and end fittings, or ask the technician to confirm the fit.
Can the opener lift the door with a broken cable?
It might move the door a few inches, but it should not be allowed to. The springs, not the opener, are meant to do the lifting. Forcing the opener can bend the track, strip the drive, and drop the door unevenly. Disconnect it and call a technician.
Do I need new springs too?
Only if the spring is the cause or is worn out. A broken spring must be replaced. If an old spring is still working, a pro may suggest swapping it during the same visit to save a second trip. Ask them to show you the wear.
What is a safety cable?
A safety cable runs through the center of an extension spring and anchors at both ends. If the spring breaks, the cable keeps the loose pieces from whipping around the garage. Many older installs lack them, and adding one is inexpensive and wise.
Should I lubricate garage door cables?
Skip grease on the cable itself. Grease collects dirt and grit, and that can wear strands faster. A light garage door lubricant on rollers, hinges and moving points is fine, as your door’s manual allows. Wipe off any excess.
Is commercial garage door cable replacement different?
Commercial doors are larger and heavier, and often use different cable and drum hardware. Hire a technician who works on commercial doors rather than treating it like a home repair.
Can I use any steel wire as a substitute?
No. A wrong diameter, weaker steel grade or poor end fitting can fail without warning. Use the cable your door’s manufacturer or a garage door supplier specifies.
The Bottom Line
That bang in the garage usually means one thing: a worn cable, a broken spring, or both. Diagnose first, then pick your path. On an extension-spring door, careful DIY garage door cable replacement is possible for a handy person with a helper. On a torsion door, call a pro, replace both sides, and ask for an itemized quote that includes a balance test.
Before you call anyone, unplug the opener, keep people and cars clear of the door, and photograph the frayed cable, the drum or pulley, and the springs so you can describe the damage on the phone. Then get two quotes. Which side of your door sagged first, and did you find a frayed cable or a loose spring? Let me know in the comments.