
Charcuterie Cups: Ideas, Styles and How to Host With Them
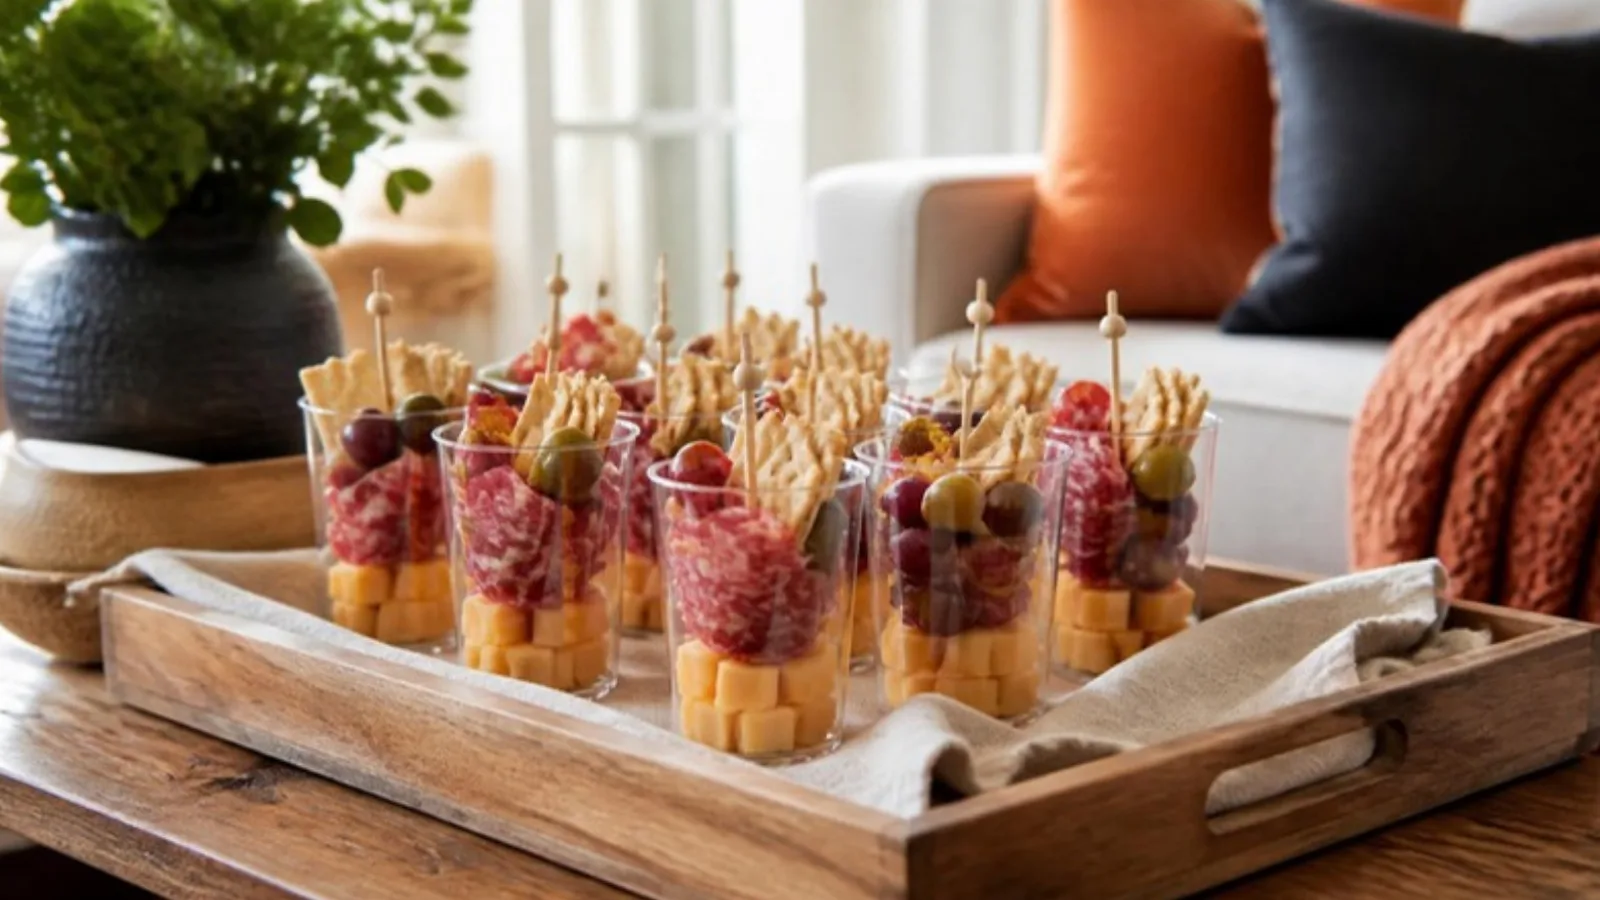
Picture a living room full of guests holding drinks, and a big charcuterie board in the middle of the coffee table. Within ten minutes it looks like a raided pantry. Someone is reaching across a neighbor for the last slice of salami. The cheese knife has wandered off. That’s the moment charcuterie cups earn their spot. Each guest gets a tidy, handheld portion, nobody double-dips, and your table stays presentable for the whole party.
I’m treating this as a hosting project, so display and serveware get as much attention as the food, along with honest notes on cost, quantities and food safety.
The short version
- Use clear 9 oz cups (or similar) and build in layers: sturdy items at the bottom, a skewer of meat and cheese on top, crunchy items last.
- Plan on more than one cup per guest if cups are the main food, and fewer if they sit beside other appetizers.
- Prep most of the parts a day ahead and follow the USDA time limits for serving.
What are charcuterie cups and why are they so popular?
Charcuterie cups are single-serve versions of a charcuterie board, so you’ll also hear them called individual charcuterie cups. Instead of spreading meat, cheese, fruit and crackers across a platter, you pack a small portion of each into a cup or similar container, usually with a skewer or pick on top. They’re popular because they solve the problems boards create at parties: shared hands, messy cutting and uneven portions.
They also travel well, stack on a tray and look deliberate. A board takes skill to arrange so it still looks good after the first few guests dig in. Cups look finished from the first guest to the last, which is a real advantage if you want to talk with people instead of rebuilding a platter.
The trade-off is prep. Cups take more time than a single board because every cup is assembled individually. For a small gathering that’s a pleasant hour, and for a big crowd it becomes a real production, which we’ll plan for below.
What cups work best for charcuterie cups?
Clear plastic cups around 9 oz are the most common choice among recipe bloggers, since they hold a skewer, a few crackers and a handful of extras without tipping. That size is a popular preference rather than a standard, so treat it as a starting point. Clear walls matter because the layers are the whole look.
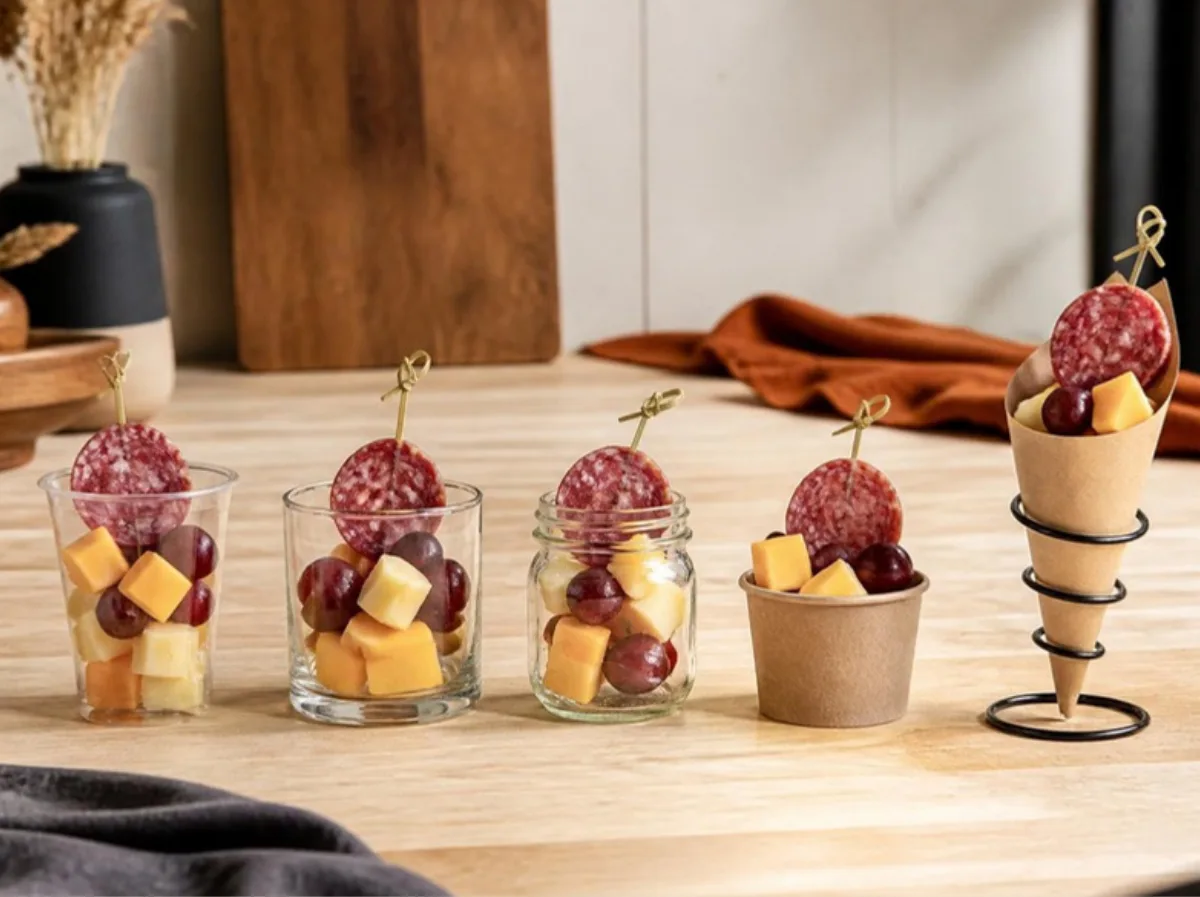
Here’s how the main options compare for a home host.
| Container | Strengths | Limits | Best for |
|---|---|---|---|
| Clear plastic cups (about 9 oz) | Cheap, stackable, you can see the layers | Single use, flimsy when heavily loaded | Big parties, easy cleanup |
| Reusable glasses or small jars | Looks upscale, no waste | Needs washing and storage, breakage risk | Small dinners, showers |
| Paper french fry or dessert cups | Low cost, no hard edges | Not see-through, grease can show | Casual game day, outdoor events |
| Cones (paper or parchment) | Fun shape, light | Tip over without a stand | Cocktail hours with a cone holder |
| Leaf cups (banana or palm type) | Compostable, natural look | Harder to find, uneven size | Garden parties |
Some home cooks on Reddit raise a fair concern about the waste that disposable cups create. If that bothers you, small jars or short glasses are a good middle path, and leaf cups or corn husks come up as another suggestion. My own rule is simple. Use disposables when you’re serving 25 or more, and use glassware when you’re serving 10 or fewer and enjoy setting a nice table.
Pick whichever style you choose with the shape in mind. A cup that’s much wider than it is tall lets skewers lean. A narrow, tall cup holds skewers upright and shows off layers.
What goes into a charcuterie cup?
A good cup has five parts: a meat, a cheese, something crunchy, something fresh or sweet and something briny or savory. A common informal guideline, often called the 3-3-3-3 rule, suggests three meats, three cheeses, three carbs and three extras for a full board. For a cup that’s too much. At cup scale, two meats at most keeps the cup readable and the cost down.
Here’s a way to think about each part:
- Meat: salami, prosciutto, soppressata or a pepperoni-style stick. Rolled or folded slices thread onto a skewer well.
- Cheese: firm cubes such as cheddar, gouda or Colby-style, plus one softer option like a small mozzarella ball. Firm cheeses survive a few hours without sweating.
- Crunch: crackers, breadsticks, pretzel crisps or nuts.
- Fresh or sweet: grapes, berries, dried apricots or a few mango slices.
- Briny: olives, cornichons or marinated artichoke pieces.
One misconception worth correcting: more varieties don’t make a better cup. Two or three meats in a single cup crowd out everything else and blur the flavors. Fewer, better-chosen pieces taste cleaner and look sharper.
How do you build a charcuterie cup step by step?
You build charcuterie cups from the bottom up, and the order matters because it keeps everything upright and the crackers dry. Start with the heaviest, sturdiest items at the base, add softer pieces in the middle, then finish with the skewer and the crunchy items on top. Once you have a rhythm, each cup goes together quickly.
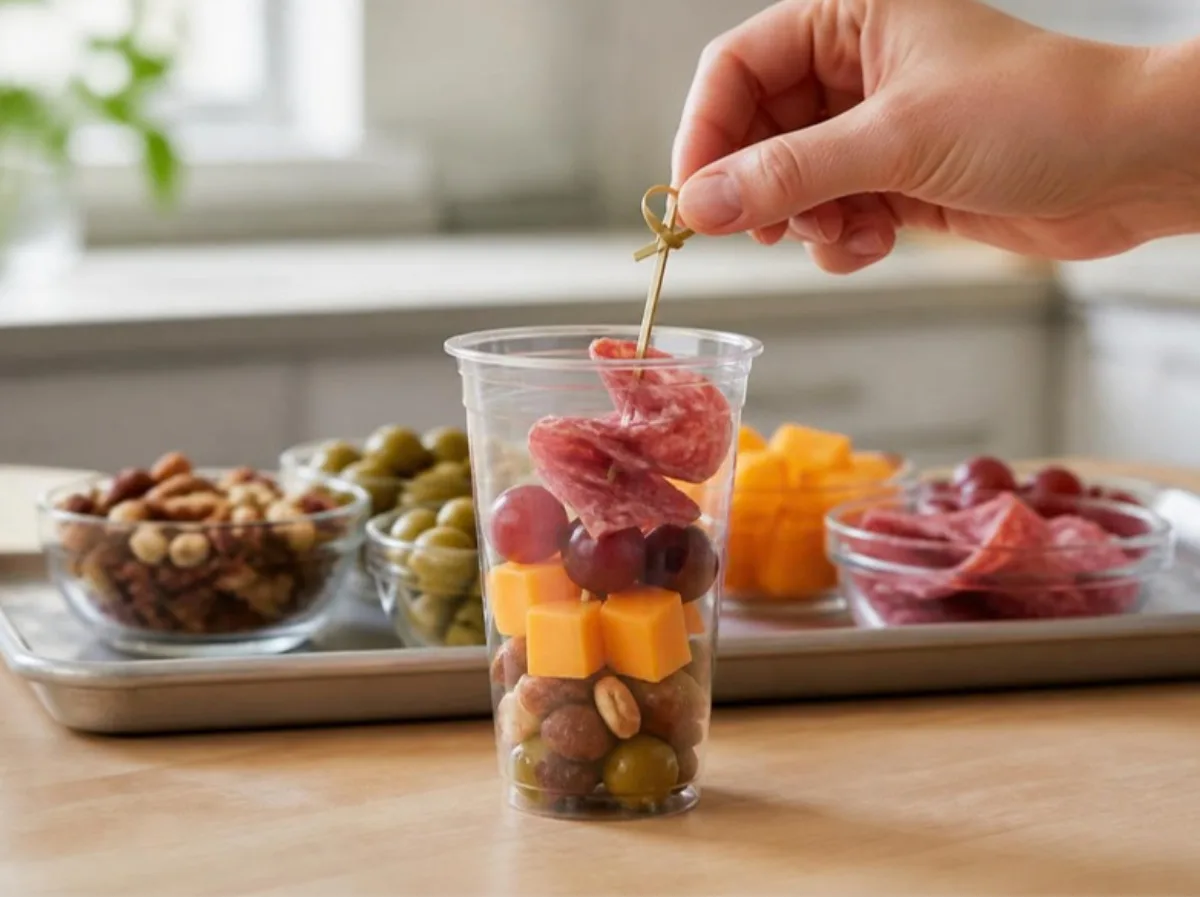
- Set up an assembly line. Line up cups on a sheet pan so you can carry them, and put each ingredient in its own bowl.
- Prep the parts. Cube cheese, wash and dry grapes, drain olives and pickles on paper towels, and fold salami.
- Fill the base. Add nuts, olives or a small scoop of spread to anchor the cup (more on this next).
- Add the middle layer. Tuck in fruit and a few cheese cubes.
- Thread the skewer. Alternate cheese, folded meat and a fruit or pickle. Keep the pieces snug.
- Add crunch. Slide crackers or breadsticks in at the back or top, close to serving time.
- Check height. Skewers should rise above the rim by about an inch so guests can grab them easily.
What goes in the bottom of a charcuterie cup?
Put something sturdy and dry in the bottom of the cup, like nuts, olives, dried fruit or a spoonful of a thick spread such as hummus or fig jam. It keeps the rest of the contents elevated, prevents sliding and holds the skewer in place. Avoid anything wet or runny at the base because it moves upward and softens crackers.
Think of the bottom layer as a foundation. Nuts and dried fruit do the job best because they’re stable, they don’t weep and they give guests a little treat at the end. A dollop of jam works too, as long as it’s thick and you press the skewer into it gently.
What are the best charcuterie cup ideas and styles?
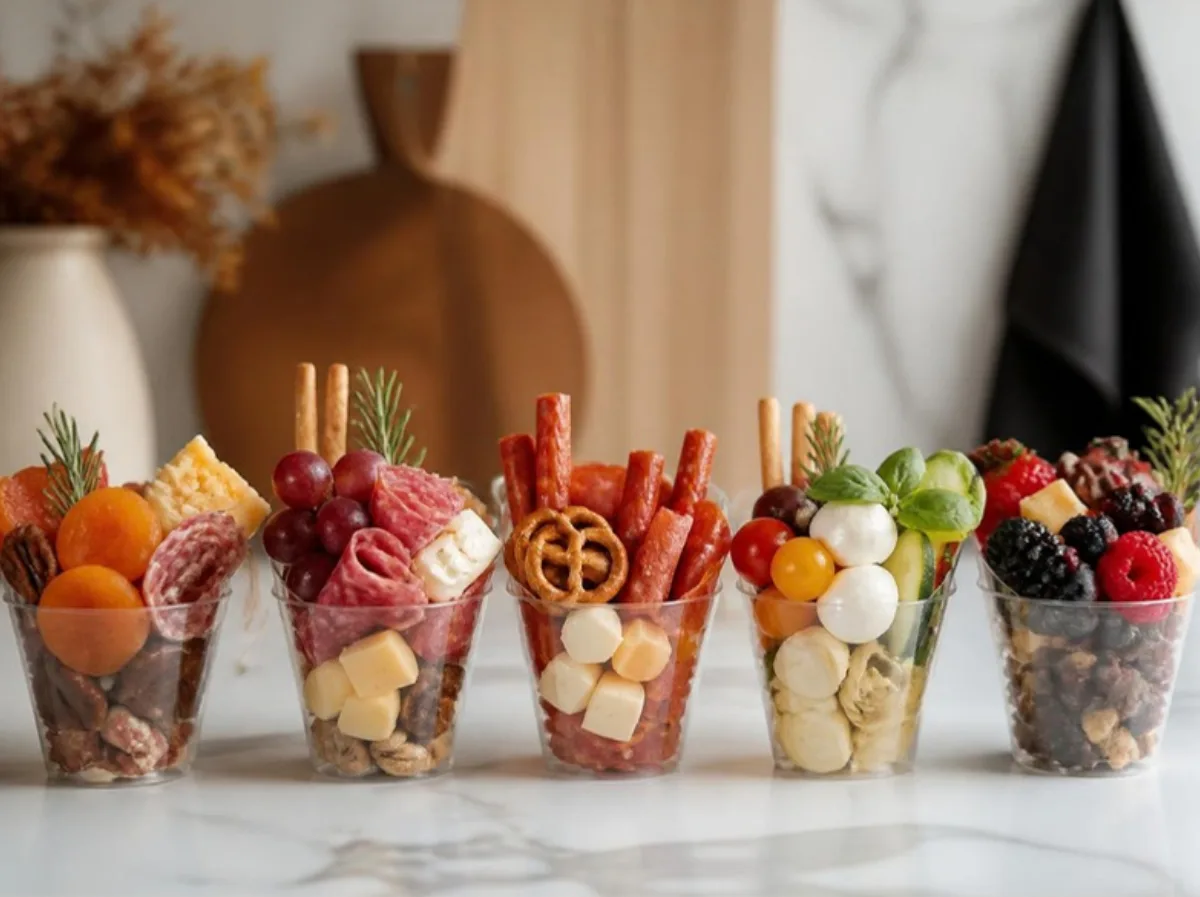
The best styles take one simple build and change the colors, flavors and garnishes to fit the event. You don’t need a new recipe for every party. Swap two or three ingredients, and the same structure works for a holiday, a game day or a baby shower. Here are the styles I’d start with.
Charcuterie cup ideas by season and holiday
For fall, try dried apricots, aged cheddar, pecans, sliced apple (tossed in lemon juice so it doesn’t brown) and a thin salami. For winter holidays, use red grapes, white cheddar, rosemary sprigs and cranberry-forward crackers for a red, green and white look. Spring suits fresh berries, mild cheeses and mint. Summer works with melon, mozzarella balls and basil. Summer cups also suit a backyard gathering, such as around a stock tank pool.
A sprig of herbs doubles as garnish and as table decor. It’s a small touch that makes a tray look planned.
Game day cups
Think bold and salty. Pepperoni sticks, pepper jack cubes, pretzel bites, pickles, jalapeno-stuffed olives and a spoonful of mustard at the bottom. Serve these in sturdy paper cups or short plastic tumblers in team colors, since nobody is fussy about presentation when the game is on.
Wedding, shower and cocktail hour cups
Here guests are holding drinks and talking, so cups should be easy to eat with one hand. Use clear cups, a light and balanced build (cheese, a mild meat, fruit, a cracker) and a neat skewer. One reader question that comes up on wedding forums is whether a single cup per person is enough for cocktail hour, and that’s a quantity question we’ll answer below.
Brunch cups
Go lighter and brighter. Use mild cheese cubes, a thin folded ham or smoked salmon roll, berries, mini pastries or granola-style crunch, and a small spoonful of yogurt or jam at the bottom. Serve them in short glasses next to the coffee so they feel like part of the table, not an extra dish.
Kids’ cups
Use mild cheese cubes, turkey roll-ups, grapes (quartered for younger children), pretzels and a few crackers. Skip the skewers for little ones and use a spoon or just let them eat by hand. Sharp picks and young kids don’t mix.
Vegetarian and sweet dessert cups
For a vegetarian cup, replace meat with marinated mozzarella, roasted chickpeas, artichoke hearts, roasted peppers and extra nuts. For a sweet version, layer chocolate pieces, berries, mini cookies, pretzels and a strip of dried fruit. Dessert cups are a nice finish after a meat-and-cheese round.
How much do charcuterie cups cost per person?
Cost depends on the cheese, the meat and how many parts you put in each cup, so the honest answer is a range, not a single number. One food blogger who built about 275 cups for a wedding reported roughly $2.00 per cup using warehouse and grocery stores, but that’s one person’s figure and prices vary by region and year (the details are on Dinner in 321).
Here’s a typical way to think about three tiers. These are relative levels, not prices, because store prices change.
| Build | What’s in it | What drives cost |
|---|---|---|
| Budget | Cheddar cubes, pepperoni sticks, grapes, pretzels | Store brands, bulk packs, fewer meats |
| Mid-range | Two cheeses, salami, olives, nuts, crackers | Deli counter slices, more ingredient types |
| Premium | Aged cheese, prosciutto, fig jam, specialty crackers | Imported items, small-batch products, specialty shops |
The biggest cost levers are the meat and the cheese. Prosciutto and aged cheeses cost far more per ounce than cheddar and salami. To save money without making cups look cheap, buy block cheese and cube it yourself, use bulk nuts and fill space with seasonal fruit. Pre-sliced and pre-cubed packs cost more for the convenience. Whatever you spend, add a little for waste, since a few cups will always be dropped or built badly.
How many charcuterie cups do you need per guest?
It depends on whether cups are the main food or one dish among several. For a cocktail hour or appetizer spread with other food, plan around one cup per guest, with a few extras. If the cups are the main event, plan two to three per person. These are planning rules of thumb, not tested numbers.
As a rule-of-thumb example, say you’re hosting 20 people for a two-hour open house with a few other appetizers on the table. Making 24 to 28 cups covers everyone plus a cushion for second helpings. If the same 20 guests are arriving after work and cups are dinner, you’d want closer to 40 to 60 by the same rule, and you’d also want some heartier items like sliders or soup.
Can you make charcuterie cups ahead of time?
Yes, partly. Some recipe bloggers say you can prep and assemble cups up to a day ahead if you keep crackers separate and add them at the end. One of the sources I read for this guide recommends assembling no more than 45 to 60 minutes before serving for best results. My advice is to prep parts a day ahead and assemble the morning of.
Here’s a timeline that works for most home hosts:
- The day before: Cube cheese, wash and dry fruit, slice meats and portion nuts. Store each item in a container in the refrigerator.
- The morning of: Fill the cups and thread skewers. Cover trays with plastic wrap and refrigerate.
- Shortly before serving: Add crackers, pretzels and any garnish that wilts. Pull trays out and let them sit just briefly.
Why add crackers last? Moisture from cheese, fruit and olives tends to soften dry crackers, and soggy crackers are a common problem with make-ahead cups.
How do you display and serve charcuterie cups at home?
Serve cups on a tray, a tiered stand or a wooden board so guests can see the whole set and pick one without touching the others. Cups look best at a few different heights with a little room between rows. For a permanent display spot for serveware, floating shelves work well.
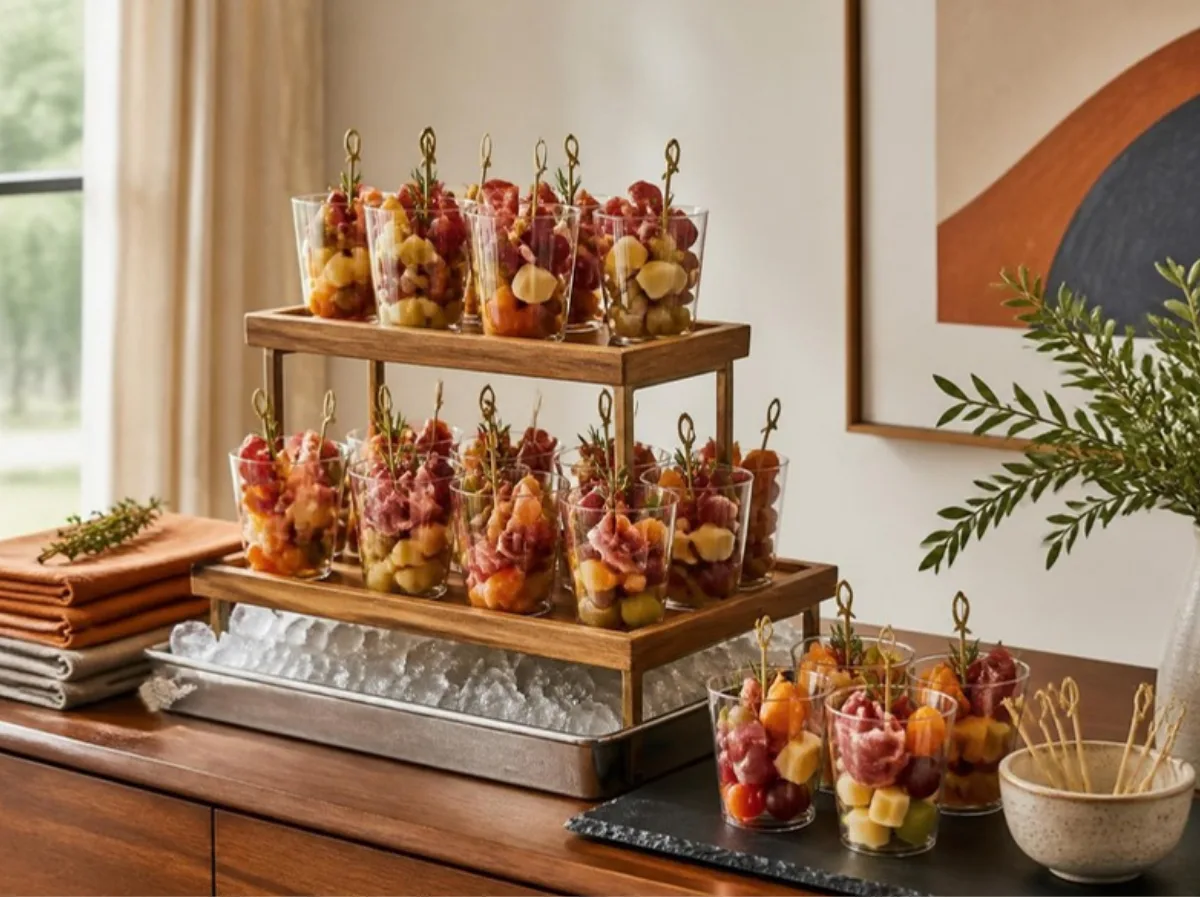
Some setup tips that suit a home setting:
- Line the tray: A wooden board or slate tray makes clear cups pop. Put a sheet of parchment or a thin cloth liner under the cups so they don’t slide when someone lifts one.
- Add height with risers: Set a small box, cake stand or upturned bowl under a cloth to lift the back row a few inches. Put taller cups at the back and shorter ones in front so every cup stays visible.
- Keep the extras close: Fold napkins at one end and set a small bowl for used skewers right beside the tray, so picks don’t end up on your furniture.
- Pick the spot with care: A side table or console near the room’s entry spreads guests out. Choose a place with soft, even light and away from direct sun or a heating vent.
- Ice tray for hot days: Set a shallow tray of ice under your serving tray, which keeps cold food cold (more on safety below).
How long can charcuterie cups sit out safely?
The USDA Food Safety and Inspection Service says perishable food shouldn’t sit out for more than 2 hours, and only 1 hour when the air temperature is above 90 degrees Fahrenheit. Bacteria can double in as little as 20 minutes in the "danger zone" between 40 and 140 degrees. Keep cold food at 40 degrees or below until you serve it (see the USDA danger zone guidance).
In practice, that means you shouldn’t set out all your cups at once. Bring out one tray, keep the second in the refrigerator and swap them when the first has been out for about an hour. On a warm patio, serve over ice and replace trays sooner.
Start your clock the moment cups leave the refrigerator, not the moment the first guest arrives. Throw away any cup that has sat past the limit, even if it looks fine.
Wash your hands before you assemble, and use clean cutting boards and utensils. If anyone at your party is pregnant, immunocompromised or elderly, check current guidance from a health professional about soft cheeses and deli meats. Local rules and individual health needs vary.
What mistakes ruin charcuterie cups?
The most common problems are soggy crackers, toppling skewers, overstuffed cups and food left out too long. All of them are easy to prevent with a bit of planning. Here’s what to watch for and how to fix each one.
- Soggy crackers: Add them at the last minute, or serve them in a separate small cup next to the main one.
- Tipping cups: Use a heavy base layer and a muffin tin or carrier to keep them upright.
- Overstuffing: Cramming a cup makes it hard to pull items out. Leave about a half inch of space at the rim.
- Making them too early: Cut apples brown, cheese dries at the edges and crackers go soft.
How do you make charcuterie cups for dietary needs?
Make a small separate batch and label it clearly. For gluten-free guests, use gluten-free crackers or skip crackers and add nuts. For vegan guests, use plant-based cheese, hummus, olives, roasted vegetables and fruit. For allergies, avoid cross-contact by using clean utensils and keep nut cups apart from nut-free cups.
This isn’t medical advice. Ingredients and brands vary, so read labels, especially on cured meats, crackers and spreads, and ask guests with serious allergies what they can safely eat.
Charcuterie Cups FAQ
What size cup is best for charcuterie cups?
A clear cup of about 9 oz is the most common choice among recipe bloggers because it fits a skewer, a few crackers and a layer of extras. It’s a popular preference and not a rule. Taller, narrower cups show layers better and hold skewers upright.
Can I use reusable glasses or jars?
Yes. Short glasses, small mason jars and dessert cups all work and produce less waste than disposables. They cost more up front and can break, so they suit smaller gatherings.
How far ahead can I assemble them?
You can prep ingredients a day ahead and assemble cups the morning of the party. Sources differ, from 24 hours ahead to 45 to 60 minutes before serving, as covered in the make-ahead section above. Keep everything covered and refrigerated.
How long can they stay out at a party?
Follow the USDA limits in the food safety section above. Serve cups in batches and keep reserves in the refrigerator.
What is the 3-3-3-3 rule?
It’s an informal guideline for boards, not an official standard. It suggests three meats, three cheeses, three carbs and three extras like fruit, nuts or spreads. For cups, scale it down. Pick one or two meats, one or two cheeses, one crunchy item and one or two extras so each cup stays balanced and doesn’t look crowded.
How do I keep crackers from getting soggy?
Add them last, or serve them in a separate small cup. The timeline and bottom-layer sections above cover the details.
Are charcuterie cups gluten-free?
Not automatically. Crackers, pretzels and some cured meats or spreads can contain gluten. Build a gluten-free version by swapping crackers for nuts or certified gluten-free crisps, and check labels on meats, spreads and flavored items. Cross-contact matters for guests with celiac disease.
How do I make vegan charcuterie cups?
Swap meat and dairy for plant-based items. Good options include hummus, marinated artichokes, roasted peppers, olives, cucumber, cherry tomatoes, nuts, dried fruit and plant-based cheese cubes. Use vegan crackers, and check the label since some contain dairy or honey.
How do I handle allergies?
Ask guests ahead of time, label every cup type and keep nut-containing cups on a separate tray. Use clean utensils and surfaces for allergen-free builds, and check packaging for warnings about shared facilities.
How do I store leftovers?
Refrigerate leftovers promptly, within the USDA time limit above. Cover them and keep them cold. Crackers soften in the refrigerator, so it’s better to eat the cups soon. If cups sat out past the safe window, throw them away.
The Bottom Line
Charcuterie cups turn a messy shared board into a clean, handheld snack that suits almost any gathering at home. Pick sturdy clear cups, build from the bottom up with dry items at the base, and keep crackers for the final step. Prep a day ahead if you can, plan roughly one to three cups per guest depending on the menu, and swap trays so nothing sits out past the USDA limit. Getting the house ready for guests? Our guide to closet doors helps you choose doors that keep clutter out of sight.
Go back to that crowded coffee table from the start. Replace the board with a tray of tidy cups, a bowl for used skewers and a few herb sprigs. Start with a small test batch of six this week to find your favorite flavor combination, then scale up for your next event.
What would you put in your first cup, and who’s coming to try it?


2 Comments